

【AppSheet連携手順】Googleフォーム連携の設定方法を写真付きで解説📸
Googleフォーム と AppSheet を連携したいのに、表示されない原因や設定順で手が止まっていませんか。
外部入力を扱う仕組みは、連携先と権限設定を誤ると動かなくなりやすいです。
ノーコード運用を試してきた視点から、初心者でも追いやすい手順に整理しました。
この記事では Googleフォーム AppSheet 連携 を軸に、スプレッドシート AppSheet 自動反映 や AppSheet セキュリティ設定 まで確認できます。
◉ Googleフォーム AppSheet 連携 の全体像が分かります。
◉ AppSheet 表示されない ときの代表的な原因を確認できます。
◉ AppSheet セキュリティ設定 の見直しポイントを整理できます。
◉ 業務効率化 ノーコード につながる使い方をイメージできます。
【Googleフォーム/AppSheet連携】入力表示の流れと最初の確認ポイント📝
「AppSheetでフォーム入力データを活用したい!」
そんな方に向けて、Googleフォームを使って外部からデータを収集し、それをAppSheetで可視化する手順を解説します📊✨
【Googleフォーム/AppSheet連携】初心者向けの全体像と導入メリット🌟
◉ アプリ開発未経験者でも扱いやすいノーコード連携術
◉ Googleフォームで外部ユーザーからデータを収集できる
◉ スプレッドシートを介してAppSheetに自動反映が可能
【Googleフォーム/AppSheet連携】導入手順を画像付きで順番に解説🛠️
以下の説明は右上の「Improved Editor」モードを解除した「Legacy Editor」での説明です
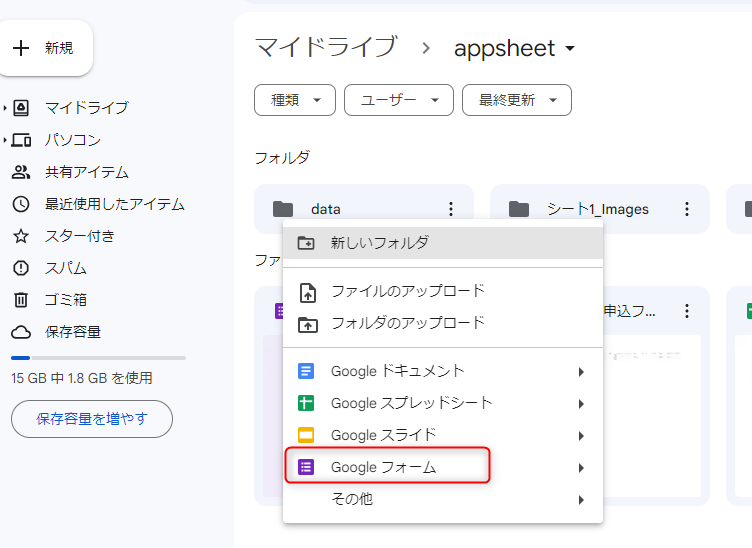
① Googleドライブのフォルダを開いて「Googleフォーム」を新規作成します。
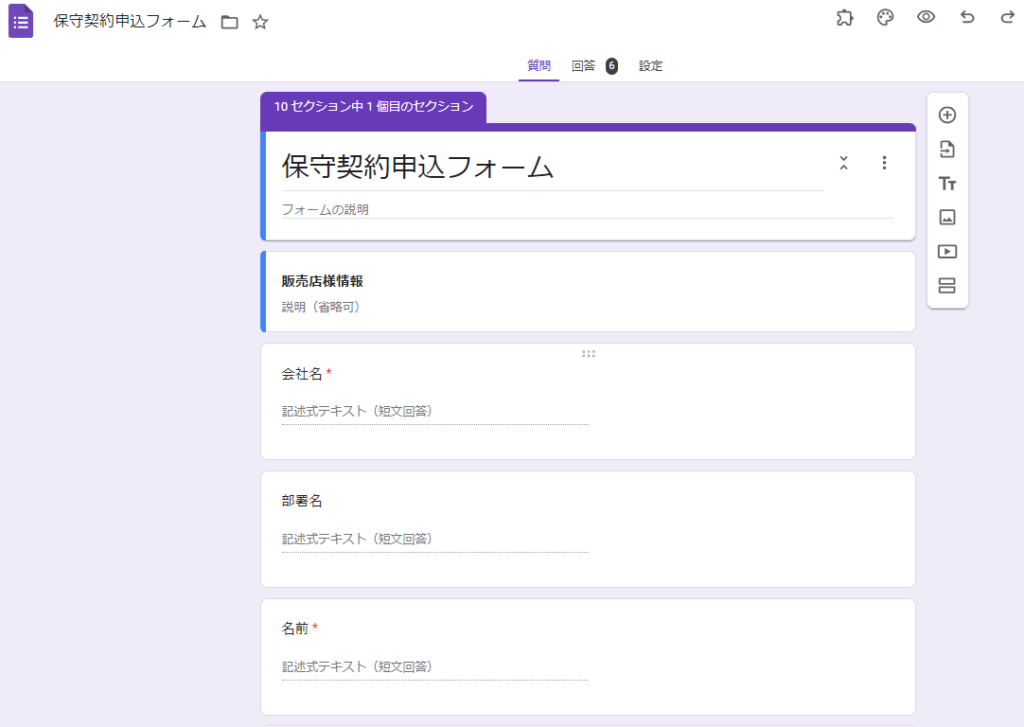
② Googleフォームでフォームを作ります。(難しくないですし、本題から外れるので割愛)
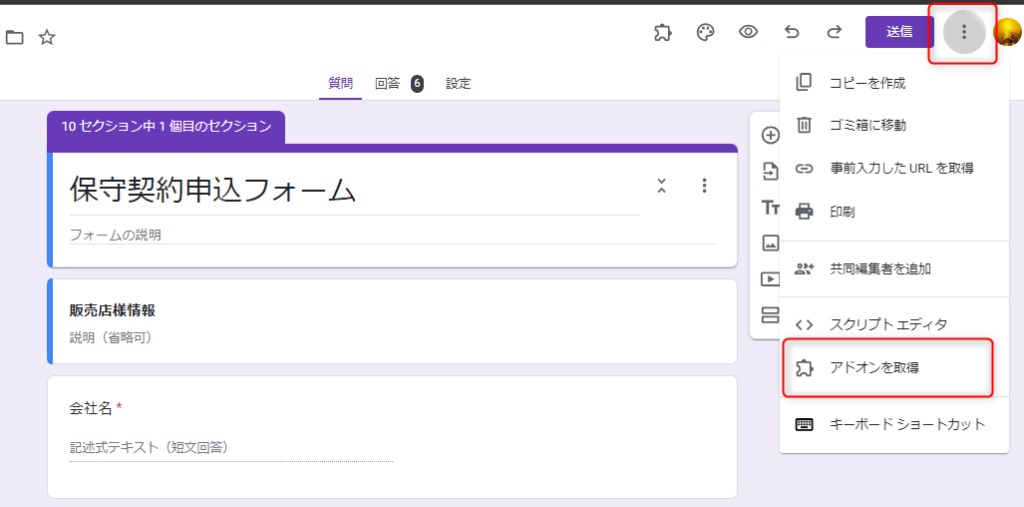
③ 右上のメニューから「アドオンを取得」を選びます。
④ Google Workspace Marketplaceのウィンドウを開きます。
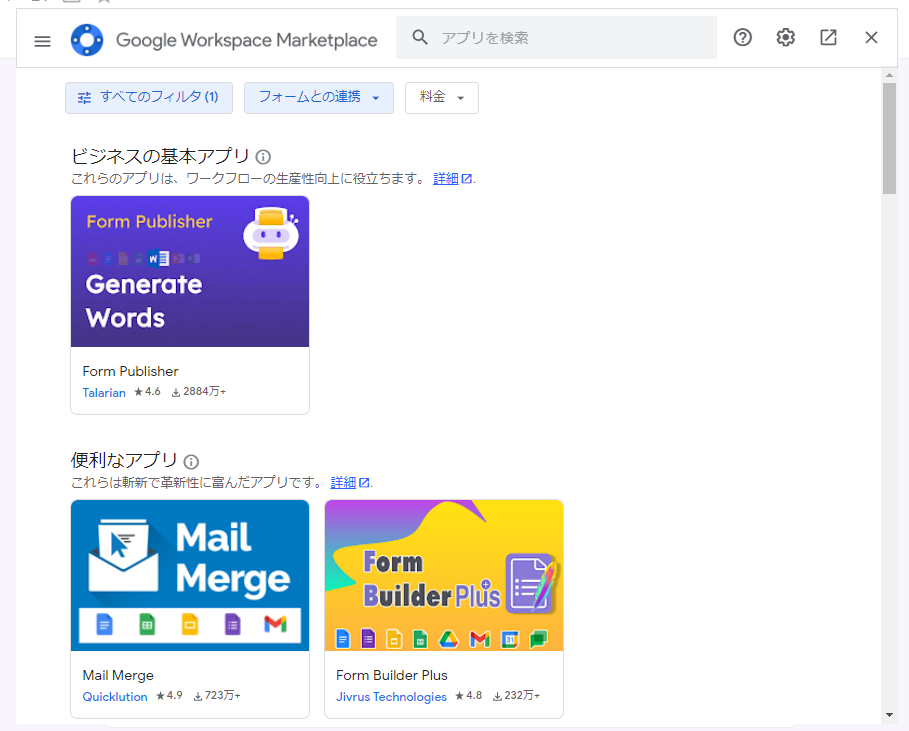
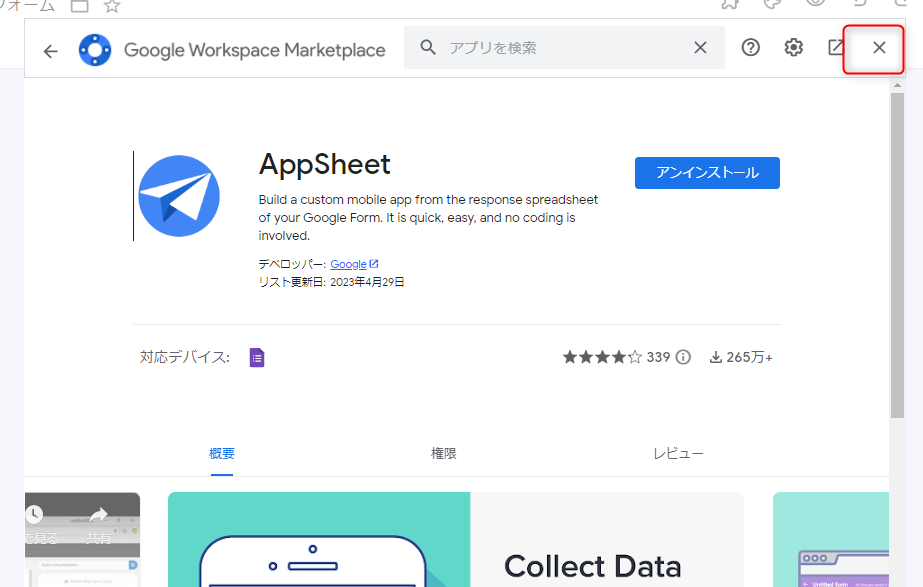
⑤ 右上の検索ウィンドウにAppSheetと入力します。
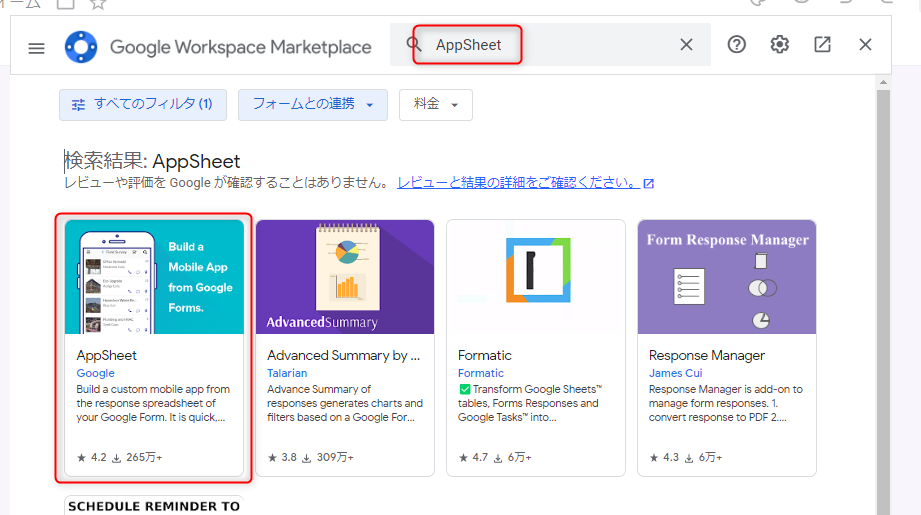
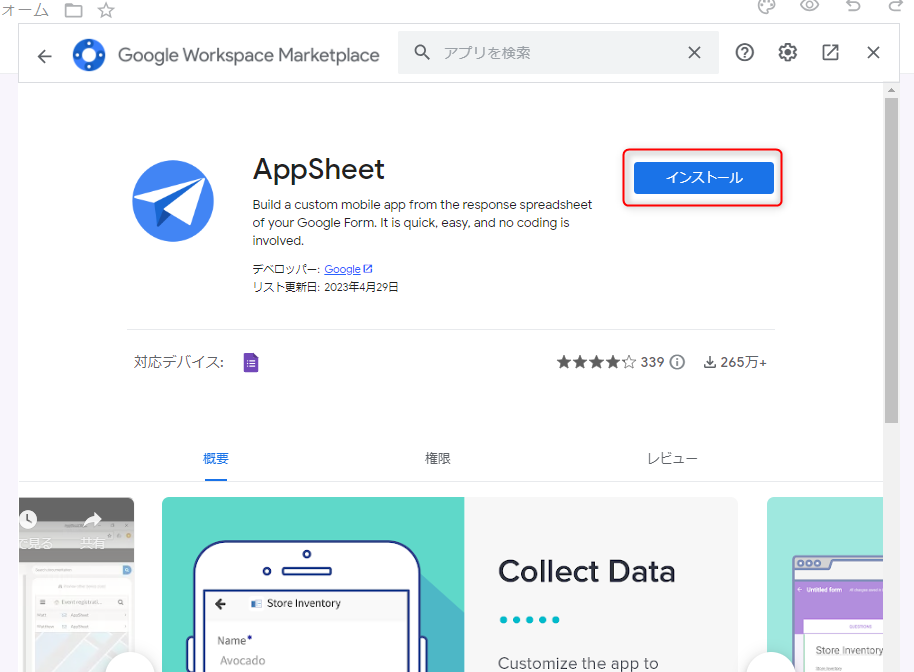
⑥ AppSheetが表示されたら「インストール」を押します。
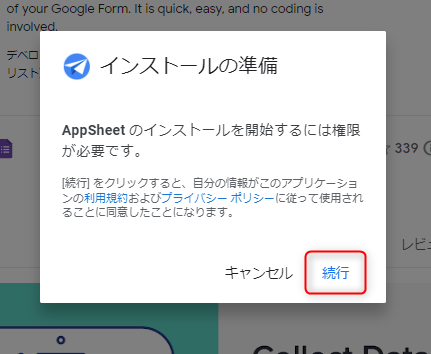
⑦ 確認画面が表示されるので「続行」を選びます。
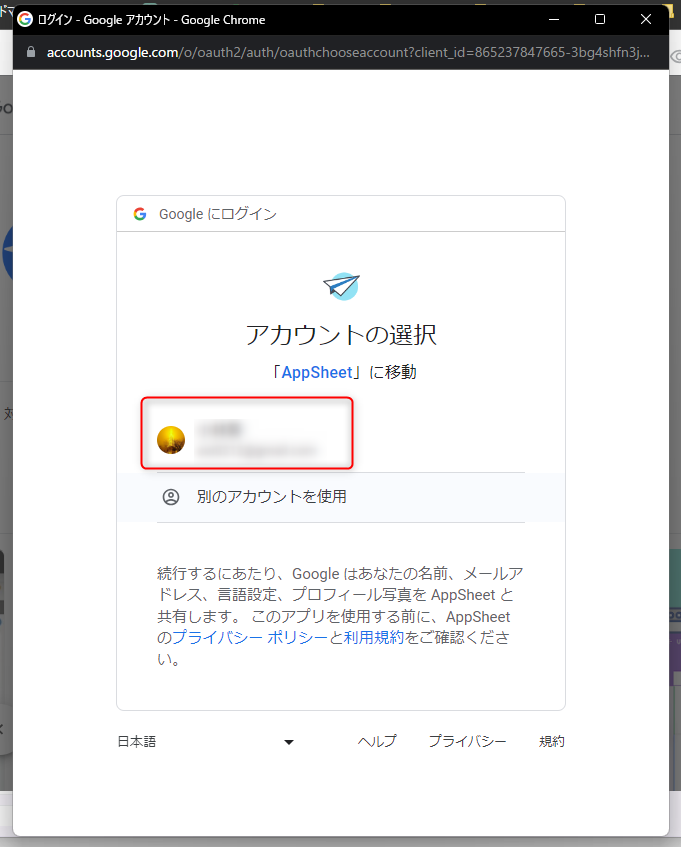
⑧ アカウントの選択ウィンドウがありますので、アカウントを選びます。
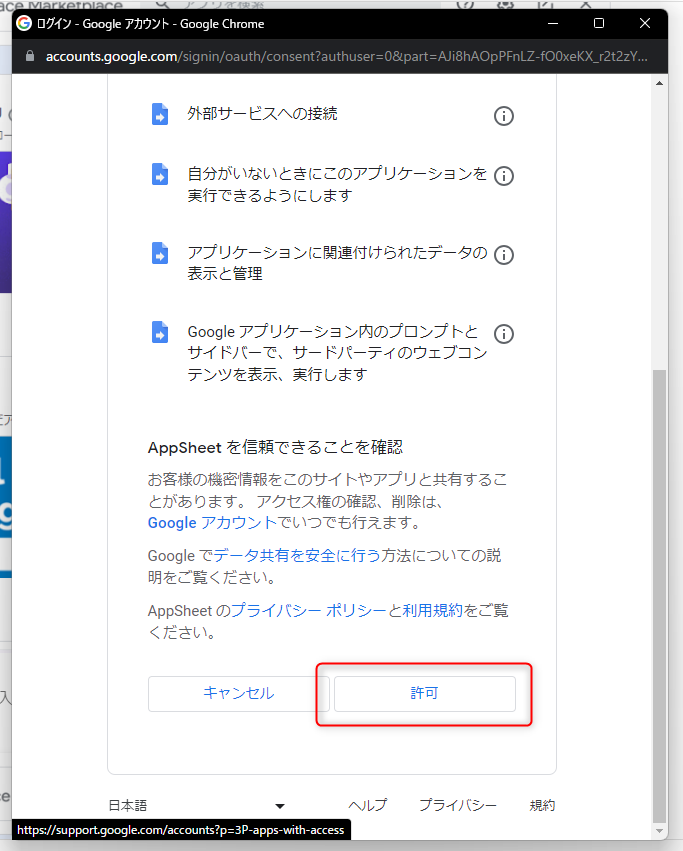
⑨ 権限許可のウィンドウが表示されますので「許可」を選びます。
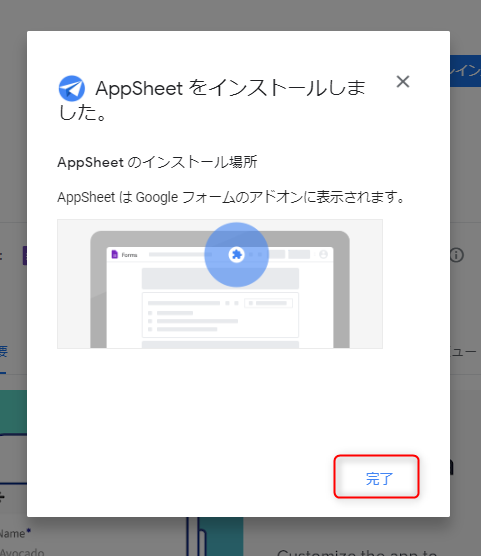
⑩ AppSheetがインストールされますので、「完了」を選びます。
⑪ 右上の「×」ボタンでウィンドウを閉じます。
【Googleフォーム/スプレッドシート連携】回答保存設定の基本手順📗
GoogleフォームのデータをAppSheetで扱うには、まずスプレッドシートに保存する必要があります📊
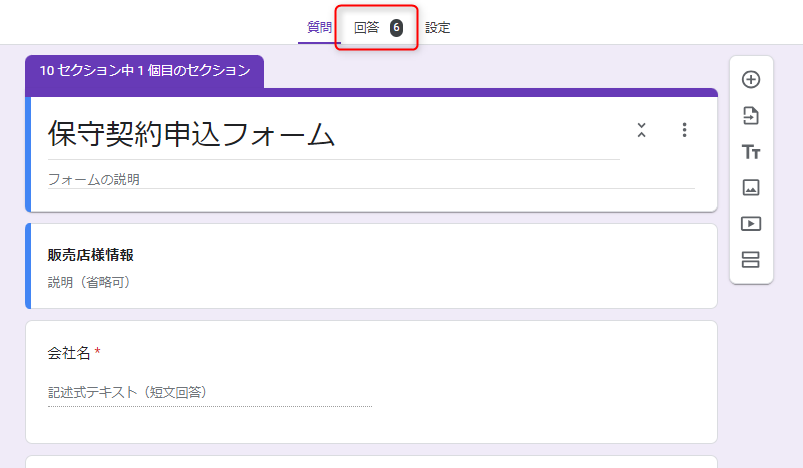
① GoogleFormで「回答」タブを選びます。(下記の例は、既に6個入力しています)
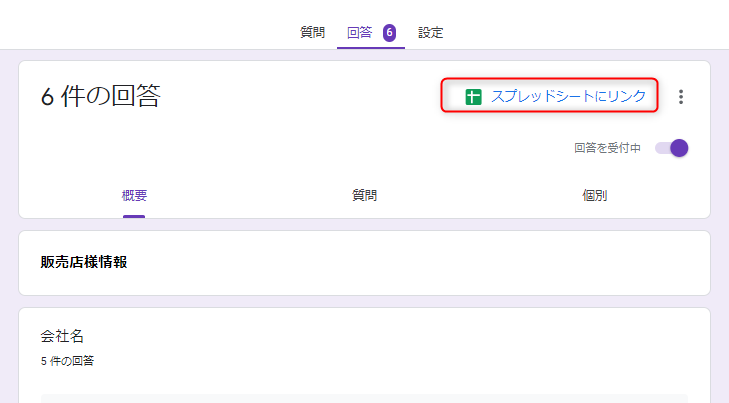
② 「スプレッドシートにリンク」と表示があるので選びます。
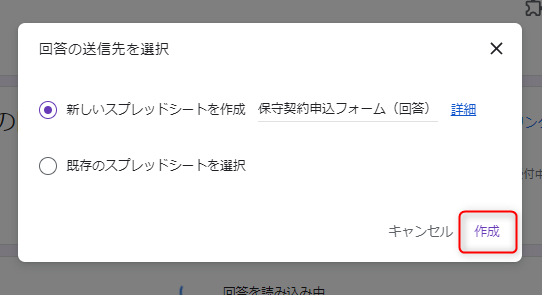
③ ファイル名の設定画面が表示されるので「作成」を選びます。
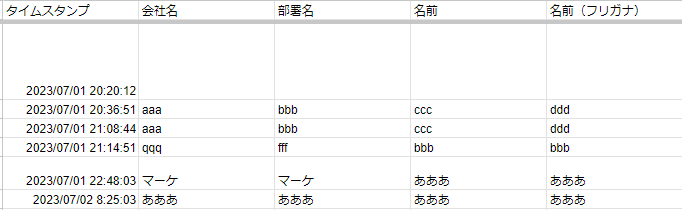
④ フォームの結果がスプレッドシート形式で表示されます。
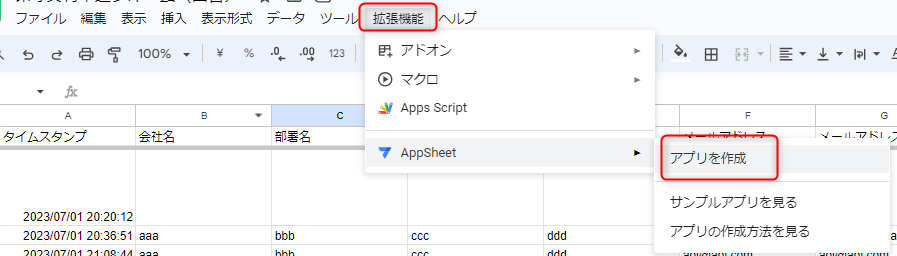
【スプレッドシート/AppSheet反映】アプリ作成までの流れを簡単整理📲
スプレッドシートができたら、それを元にAppSheetアプリを作成します📱✨
① スプレッドシートの「拡張機能」からAppSheetの「アプリを作成」を選びます。
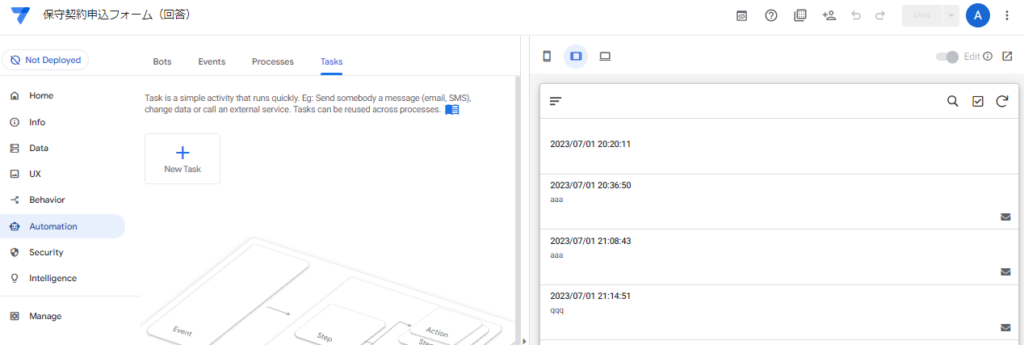
② アプリの作成が始まりReadyページが表示されるので、右上の「×」で閉じます。

③ 閉じると下記のようにAppSheetのアプリが表示されます。
【AppSheetで表示されない原因】反映されない時の確認ポイント⚠️
GoogleフォームとAppSheetを連携したのに、フォームに入力したデータがAppSheetに表示されない…そんなトラブル、意外と多いんです😥
ここでは、AppSheetでデータが反映されない原因と対処法を、初心者にもわかりやすく解説します💡
【AppSheetでよくある不具合】表示エラーの原因を先に総点検⚡
まずは、よくある「反映されない」原因をチェックしてみましょう。
◉ AppSheetがスプレッドシートの最新状態をまだ読み込んでいない
◉ スプレッドシート側の列名や構成を変更してしまった
◉ フォームの回答先がAppSheetで参照しているシートと違う
◉ AppSheetの設定で対象テーブルが無効化されている
◉ ユーザーの操作端末でキャッシュや同期ができていない
【AppSheetが表示されない時】再同期/再検出で直す対処手順🔄
以下の手順で、表示されないトラブルに対処できます。
◉ AppSheetエディタの「テーブル」設定を開き、参照元のシート名が正しいか確認する
◉ 「ビュー」上の表示設定が、対象データの列を参照しているか確認する
◉ AppSheetエディタ右上の「再同期(Sync)」ボタンをクリックする
◉ スマホアプリで使っている場合は、手動でアプリを再同期(画面下にスワイプ)
◉ スプレッドシートに新しい列を追加したときは、「構造を再検出」して列構成を再読み込みする
【高度なエラー対処/セキュリティ】見落としやすい設定確認の要点🔐
まれに、AppSheetアプリの構成そのものに問題があるケースもあります。
◉ スプレッドシートが複数のフォームとリンクしていて、正しいシートでない場合
◉ AppSheetの「セキュリティ設定」でフィルタ制限がかかっている
◉ 「スライス」機能を使っていて、表示条件に合致しないデータが非表示になっている
【入力者/閲覧者を分ける方法】権限管理の基本と設定の考え方👥
Googleフォームで外部からデータを集め、AppSheetで可視化・管理する構成は非常に便利です💡
ただし、データを入力する人と、AppSheet上で閲覧・管理する人を明確に分ける設定が必要になるケースもあります。
とくに、社内向けの業務アプリとして運用する場合や、個人情報や機密データを扱う場合には、権限管理が欠かせません🔒
【AppSheetのアクセス制御設定】外部入力を安全に守る基本知識🛡️
AppSheetでは、ユーザーのアクセス制御や閲覧範囲の設定が柔軟に行えます。
主に以下のような制御方法があります👇
◉ ドメイン指定による制限(例:@example.co.jpのみアクセス可能)
◉ メールアドレスによるユーザーごとのアクセス設定
◉ ユーザー属性に応じた「スライス」表示の切り替え
◉ Googleアカウントでのログインを必須にしてセキュリティを強化
◉ AppSheetのSecurity Filtersで閲覧範囲を制限
【AppSheetのユーザー管理】ログイン制御と閲覧制限の設定手順🔑
AppSheetでアクセス制御を設定する手順は以下のとおりです。
◉ AppSheetエディタの「Security」→「Require user signin」をオンにする
◉ Googleアカウントでのログイン認証を必須にする(Googleフォームと同じドメインで統一が望ましい)
◉ 「Users」セクションで、アクセスを許可するメールアドレスを個別に登録
◉ 必要に応じて、ユーザー属性ごとに「スライス」を設定して表示範囲を調整
◉ 「Security Filters」を使えば、ログインユーザーによって見えるデータを動的に変更可能
【AppSheet活用パターン】現場業務で役立つ運用例を具体的に紹介🏢
◉ 外部パートナーがGoogleフォームで申請 → 社内管理者がAppSheetで承認・管理
◉ 従業員がスマホでフォーム送信 → 担当部署だけがステータスを閲覧
◉ フィールドワーカーが現場入力 → 管理者のみが位置情報や履歴を可視化
閲覧者と入力者を分ける構成は、現場業務や社外連携でも非常に有効です📈
【Googleフォーム入力データの見せ方】AppSheet表示設定の基本✨
Googleフォームから取得したデータがスプレッドシートに保存されると、AppSheet上でも表示できるようになります📊
ただし、そのままだと見づらいことも多く、適切なビュー(画面表示)の設定が必要です💡
ここでは、AppSheetの基本ビューの種類と、データの見せ方・管理方法について詳しく解説します。
【AppSheetビューの種類/特徴】用途別に選ぶ表示方法の基本📋
AppSheetでは、スプレッドシートのデータを「ビュー」と呼ばれる画面で表示できます。
以下の3つが代表的な表示形式です。
◉ テーブルビュー
行ごとに一覧で表示する形式。管理や検索に便利📋
◉ カードビュー
1件ごとにカードのように表示され、見た目がスタイリッシュ📇
◉ 詳細ビュー
データの1行分を拡大表示する形式。内容確認や編集に最適🔍
【AppSheetでビューを作る方法】初期設定から作成手順まで解説🧩
AppSheetでのビュー設定はとても簡単です🛠️
以下の手順に沿って、表示形式を自由にカスタマイズしましょう。
◉ AppSheetエディタの「UX」→「ビュー」タブを開く
◉ 「新しいビューを作成」で表示形式を選択(テーブル・カード・詳細など)
◉ 表示対象のテーブル(スプレッドシート)を指定
◉ 必要に応じて、表示する列を選択・非表示設定も可能
◉ スマホ・PCそれぞれの表示をプレビューしながら調整できる📱💻
【AppSheetビュー設定の使い方】業務別に活かす画面設計のコツ🖥️
◉ テーブルビュー → 社内の申請一覧や在庫管理に最適
◉ カードビュー → 顧客リストや商品一覧の視認性アップにおすすめ
◉ 詳細ビュー → 個別データの確認・編集・承認フローに便利
【AppSheet活用におすすめ】学習効率が上がる書籍/端末の選び方📚
AppSheetをスムーズに活用するための書籍&ツールを紹介📚✨
📖 おすすめ書籍
ノーコード開発入門 AppSheetで学ぶアプリ作成 📘✨「初心者でもわかるAppSheet活用術!」

スプレッドシート仕事術 📊「Googleスプレッドシートの便利な活用法を学べる!」

🛠️ AppSheetを活用するためのツール
ノートパソコン(AppSheet開発向け) 💻「スムーズな開発をサポート!」

タブレット(AppSheetアプリ確認用) 📱「アプリの動作チェックに最適!」

【Googleフォーム/AppSheet連携】選ばれる理由と導入メリット総整理🚀
GoogleフォームとAppSheetの連携は、ノーコードで外部データ収集から業務管理まで一気通貫で実現できる強力な組み合わせです。初心者でも導入しやすく、カスタマイズ性とセキュリティ面も充実しています🔧🔒
【Googleフォーム/AppSheetの違い】役割分担と連携の強みを解説🔍
◉ Googleフォームで外部ユーザーから手軽にデータ収集が可能
◉ スプレッドシート連携でAppSheetにリアルタイム反映できる
◉ AppSheetで見やすく、使いやすいアプリ画面(ビュー)を自由に構成できる
◉ フォーム入力者とアプリ閲覧者を分離し、セキュアに管理できる
◉ 「再同期」や「構造再検出」などで、反映されないトラブルも簡単に解決
◉ スライスやSecurity Filterを活用すれば、ユーザーごとの閲覧権限も自在に設定可能
【Googleフォーム/AppSheet活用例】申請/報告/記録の運用パターン✅
| 利用シーン | Googleフォーム役割 | AppSheet役割 |
|---|---|---|
| 社外パートナーとの申請受付 | 入力フォーム(申請) | 承認・ステータス管理 |
| 従業員からの報告収集 | 報告用フォーム | 担当部門の閲覧・集計 |
| 現場ワーカーの記録 | モバイル入力 | 管理者のダッシュボード表示 |
【Googleフォーム連携のポイント】導入前に確認したい活用条件📌
◉ ノーコードで業務アプリを作りたい
◉ 外部ユーザーからのデータを安全に取り込みたい
◉ スマホから入力・確認できるシステムを探している
◉ 社内業務のペーパーレス化や効率化を進めたい
【AppSheetでの注意点】無料運用とエラー対策の基礎知識まとめ📘
AppSheetは、Googleが提供するノーコード開発ツール。
プログラミング不要で、誰でも無料から業務アプリを作れます📱✨
◉ AppSheetとは?何ができるの?
◉ 無料プランでどこまで使える?
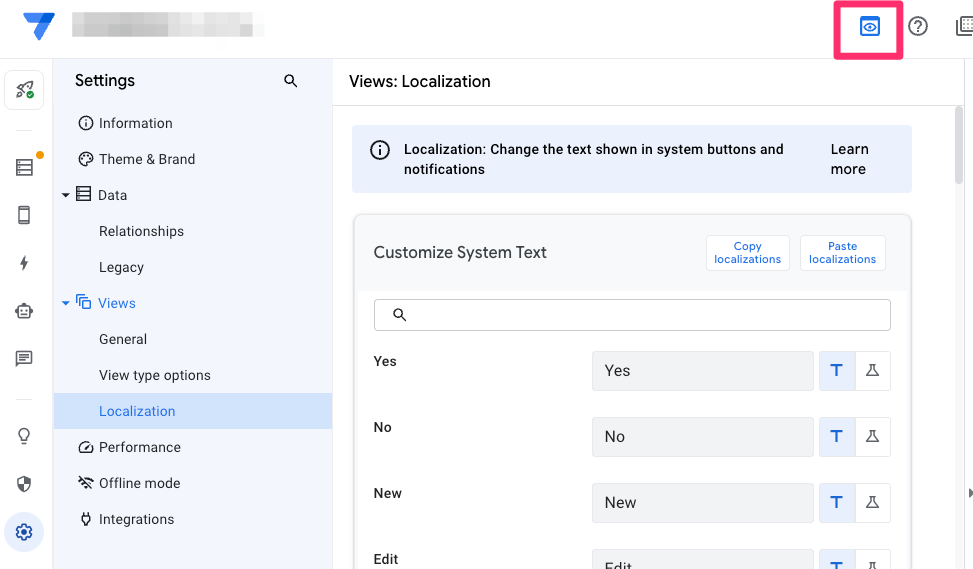
◉ デザインや日本語化はどうするの?
◉ 入力支援やエラー対応のコツって?
✅ スプレッドシートから数分でアプリ作成が可能!
✅ 無料でも主要機能が使えるので安心🆓
✅ UI自動生成&日本語対応で初心者にもやさしい
✅ 外部連携・CSV出力・自動化で業務効率アップ
✅ 403エラーや同期トラブルの解決法も紹介


コメント